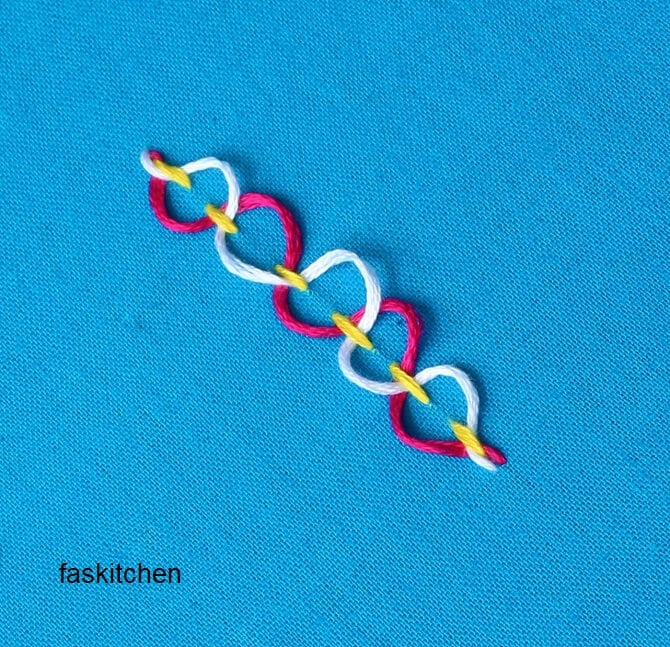
Double Threaded running stitch is a variation of the running stitch. This is pretty similar to the threaded herringbone stitch that we did recently. This stitch is also known as interlaced Running stitch.
What you will need?
- Any fabric.
- Embroidery hoop, 15cm (6″) (Bigger if you are working on a larger design)
- Tapestry needle
- Embroidery thread (You can buy the 36 pack of DMC embroidery floss from Amazon for all your basic embroidery needs)
How many strands of floss do you need for making the double threaded running stitch?
You can use all 6 strands of the floss. But if you are working on a finer design, then start with 2 strands of floss and increase the number of strands according to your design. I have used all 8 strands of floss for this tutorial
Step by Step Pictorial Process of making the double threaded running stitch

1. Start with working a running stitch.

2. With a contrasting thread, bring the needle from below the fabric at the start of the running stitch. Pass the needle under the stitch 1 of the running stitch.

3. Then again pass from above the next stitch. You will notice a wave-like pattern has formed with the white thread. Finish by passing the needle at the end of the design. Pull the thread down and secure with a knot.

4. In a similar fashion, work on the next thread with another color thread.

5. End by taking the needle down and securing the thread with a knot.
Tips for working the double threaded running stitch
- You can either use same color threads or different contrasting colors for this stitch.
What is this stitch used for?
- It can be used for filling the flowers or any patterns.
- This stitch can be used as a beautiful border design.
(THIS POST PROBABLY CONTAINS AFFILIATE LINKS. OUR FULL DISCLOSURE POLICY IS REALLY BORING, BUT YOU CAN FIND IT HERE)
More stitches tutorials:
- Stem Stitch
- Chain Stitch
- Running Stitch
- French Knot
- Lazy Daisy
- Back Stitch
- Cable Chain Stitch
- Fly Stitch
- Bullion Knot
- Woven Trellis Stitch
- Long And Short Stitch
Check out the video tutorial below
So until next time,
Keep Stitching,
Fareeha
Pin this image for later reference:

Leave a Reply